How To Add A Domain in cPanel
With your Skookum Monkey hosting package comes the ability to add up to 10 domains to your hosting account. Adding a domain to your hosting account is done through a few simple steps. This walk-through will teach you how to add a domain in cPanel.
Last Update:
Log into your cPanel account. Go to the “Domains” section.
Click “Addon Domain”.
Creating an Addon Domain in cPanel
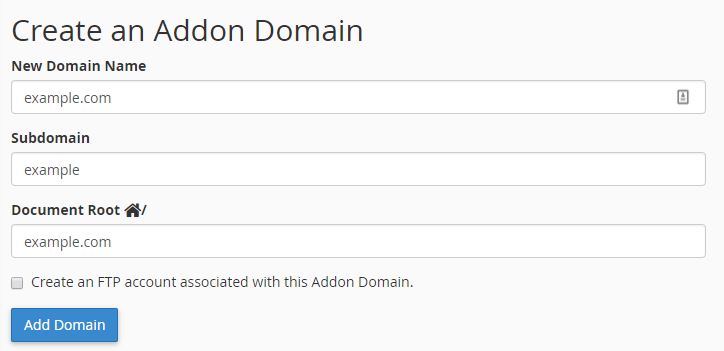
1) Enter the new domain name in the ‘New Domain Name’ field. Hit your Tab key.
2) You will notice that cPanel auto completes the next two fields. Leave the ‘Subdomain’ and ‘Document Root’ fields as the defaults.
3) What you do with the “Create an FTP account” check box depends on if someone other than the account holder will need FTP access. If it’s just the account holder who will need FTP access, you don’t need to check the “Create an FTP account” box as you’ll be able to access it with your normal FTP account. If there will be another site manager, then check this box as it will only give them access to the new domain and not everything on the hosting account.
4) Click ‘Add Domain’.
5) Log into your domain registrar. Change the nameservers for the newly added domain to the ones listed in your account information.
6) Email support to immediately issue the SSL certificate if you don’t want to wait until the server checks for new domains and automatically issues the certificate. You can always check on the status of your SSL certificate by clicking the “Home” button on the top-left of cPanel (it’s the button with the nine squares); scroll down to the “Security” section and ‘click SSL/TLS status’.

