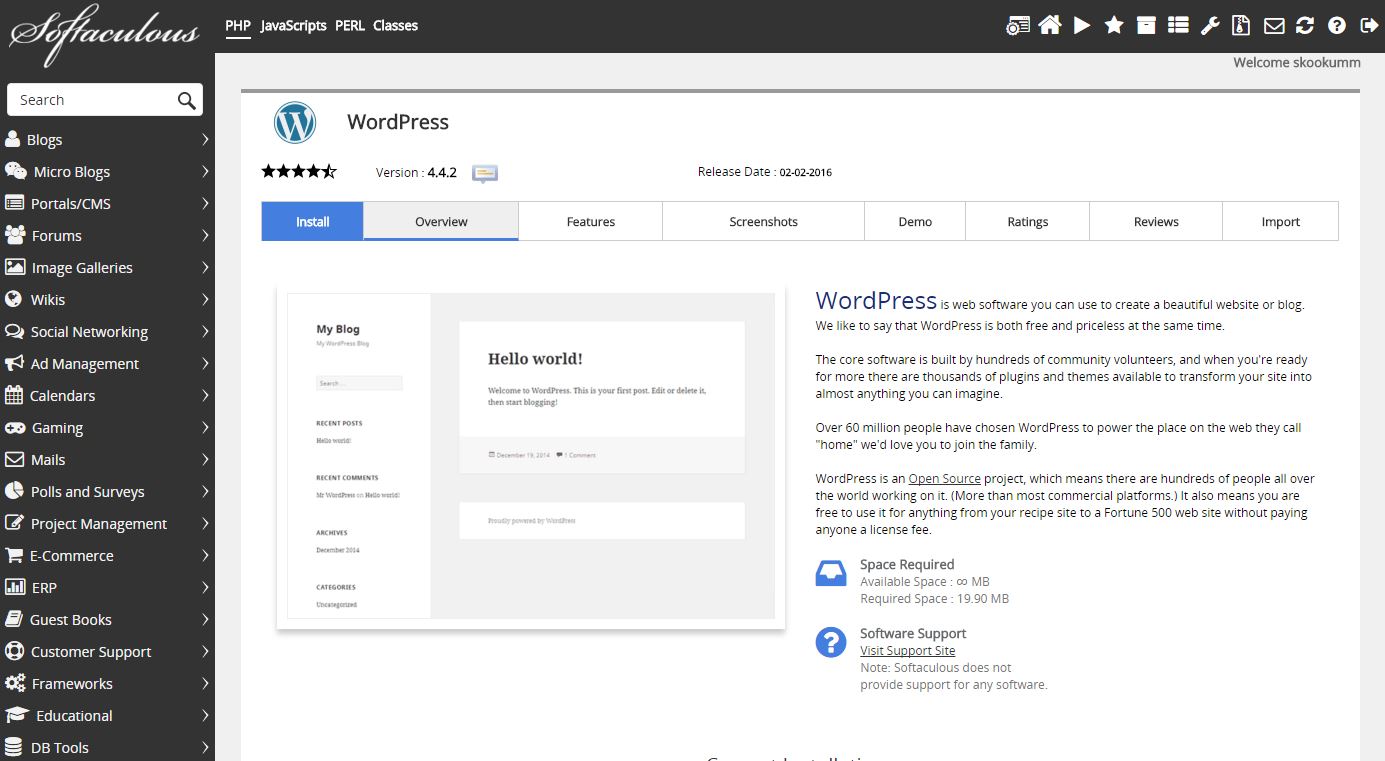
Most hosting plans, including Skookum Monkey hosting plans, come with some type of one-click WordPress installation service. There are a variety of script libraries hosting companies use to make this possible. Skookum Monkey hosting plans come with Softaculous, which allows people to easily install 394 different commercial and open source web applications. While this process is easy, there are some hidden gems in the WordPress auto-installer you should know about. Here are 22 things to do when installing WordPress via Softaculous.

1) Choose Protocol: If your hosting account has an SSL cert, switch the default “http://” to “https://”. You also have the options of “http://www” and “https://www”, but we don’t recommend you use them. If your site is hosted with Skookum Monkey, select https://. All Skookum Monkey hosting accounts come with AutoSSL.
2) Choose Domain: By default, it will have your main domain selected. This where you can select a subdomain if you have one set up.
3) In Directory: I always delete the default “wp” that is in that field and leave it empty, otherwise it installs WordPress in a different folder that Softaculous will create, and not the root directory. Sometimes you may want an added bit of security. If you so, then change this field from the default “wp”. Installing WordPress in something other than the root directly will require extra configuration steps in order for people to visit your website by simply typing the URL.

4) Site Name: This field is pretty straightforward. What is the your site or company named? Delete the “My Blog” to that name.
5) Site Description: This field is a little bit tricky. It’s your company’s tagline and you want it to be descriptive and SEO friendly. Skookum Monkey’s site description reads, “Big Business Solutions for Small Business Budgets.” Once you’ve figured that out, remove the default “My WordPress Blog” and enter your tagline. If you can’t come up with something on install, then keep the default. You can always change this later in your WordPress dashboard under Settings – General.
6) Enable Multisite: Do you plan to have a bunch of different sites under the same domain? Do you want your blog section or shop to have a different theme than your main website? If so, then select this box. Skookum Monkey has WPMU installed, and each Skookum Monkey Demo has it’s own setup, but it’s all managed in the same WordPress dashboard, instead of needing to log into multiple dashboards to manage a bunch of sites. Important: If you plan to install WPMU, then it must be in the root directory. If you didn’t erase ‘wp’ from the ‘In Directory’ field and leave it blank, go back and do that now.

7) Admin Username: For security purposes, give your admin username something other than the default “admin.” The admin username is the first account brute-force attacks go after.
8) Admin Password: Click the key to give strong password. Copy it somewhere.
9) Admin Email: If you want to use a different email than the default address it generates that is associated with the domain, enter it here.

10) Select Language: You have a lot of languages from which to choose. After you’ve installed WordPress, you can change to a specific type of English, like Canadian English, in your WordPress dashboard under Settings – General.
11) Select Plugins: It is very important that you select the check-box in “Select Plugins” area. This will give you minimum protection against brute-force attacks.

When installing WordPress via Softaculous, it is the “Advanced Options” area that the gold is found. It is also the area most often overlooked because it is closed by default, yet is is probably the most important.
12) Click the + sign to the left of “Advanced Options”.
13) Database Name: For security reasons, change the “wp” prefix. You can keep the numbers if you want, or change those too. For example, we would change “wp915” to something like “smwpag915”. The “wp” prefix is one of the first things hackers look for.
14) Table Prefix: Softaculous has gotten better at not giving the prefixes the old default of wp_ which left sites vulnerable. For extra security, change this to something that doesn’t begin with “wpxx_”. For example, we would change “wpip_” to “pagwpwm_”.
15) Disable Update Notifications: Do not select this box. You want to be notified of updates so that you can make sure everything is always up to date and secure.
16) Auto Upgrade: Check this box. It will help keep your site secure and save you time and peace of mind knowing your WordPress installation will always have the latest fixes, which often include security updates.
17) Auto Upgrade WordPress Plugins: Check this. For the same reasons as 16.
18) Auto Upgrade WordPress Themes: Check this. For the same reasons as 16 and 17.
19) Automated backups: You really want to do this. The default is “Don’t backup.” We always change to “Once a day,” but you have the options for once a week and once a month.
20) Backup Rotation: Default is “4”. We change it to “1” to save on server space. You have the option to choose “Unlimited” (we don’t recommend!) to 10.

21) If you want to install a theme other than the default WordPress theme, you can spend hours browsing themes here.
22) Finally, click install. If you want to email yourself installation details, which includes your password and database information, enter your email address.

Congratulations! Remember, when installing WordPress via Softaculous, always double-check options. Softaculous is updated regularly to add to new options and to improve on the default security.
Don’t forget to check out Skookum Monkey hosting plans. Each hosting plan comes with cPanel, Softaculous and a free dedicated SSL certificate for eCommerce sites.
Hi! Under step 3 you mention there’s further config involved if you want, say a /wp/ install to be accessible from the domain root folder… I’m stuck on this, do you know what this further config is? From a bit of research I understand it means copying some stuff to root, and changing .htaccess. This is all fine, but it seems Softaculous (I think) keeps changing .htaccess back to its original config, meaning all but the WP homepage you copied brings back a 404.
I’ve sent a ticket to Softaculous about this, but if you have any advice I appreciate it!
Hi, Kris!
So, there are three things you need to do.
1) In Settings – General, change “Site address (URL)” from https://yoursite.com/wp to https://yoursite.com
Keep the top setting (WordPress address (URL)) as is. That tells the databases where the files are stored. You need to save this first so that WordPress will automatically make some necessary changes to the .htaccess file. Until you complete steps 2 and 3, you won’t be able to access the site and you may get an error message.
2) Copy your .htaccess and index.php from the /wp/ folder to the root folder.
If you’re on Apache with cPanel, that is most likely “public_html”.
You need to keep a copy of those in the /wp/ folder.
3) In a text editor (you can do this in cPanel with the file explorer), you need to edit the index.php that is in the root directory.
Change the line that says:
require( dirname( __FILE__ ) . ‘/wp-blog-header.php’ );
to the following:
require( dirname( __FILE__ ) . ‘/wp/wp-blog-header.php’ )
(for anyone reading this who chose a folder other than /wp/, you’d replace /wp/ with whichever folder holds your WordPress files)
Now, you should be able to access the login at https://yoursite.com/wp/wp-admin/ but the public facing will be the top-level domain.
Let me know how it goes!